Chapter 7 Macros
Throughout this guide, the command line using syntax such as ColorRes and PosOriObj has been useful for doing manipulations to the structures and scenes in YASARA. However, typing many commands repeatedly can be tedious and potentially irreproducible. Static images are great illustrations of simple points, however sometimes an idea is too complex or a single image OR an interactive movie might be a more useful display item. This is where macros can come in. A macro is a file that contains all the commands as you would type them into the command line that is read by YASARA as a series of instructions for how to show, analyze, and/or record data. This chapter will focus on macros for making movies such as those shown HERE, while Chapter ?? will focus on macros for analysis.
Note: Because macros are all command line based, I will not show how to do any of these steps using the menu system. Most of them can be found with a bit of searching or using SearchDoc to find the menu path. Also, the “>” from the beginning of lines will not be shown in code boxes because they are not included in the macro file.
7.1 Text editors
Making a macro for YASARA requires a text editor such as NotePad, WordPad, or TextEdit. Each command is listed on a separate line and the entire file saved as a .mcr file type. See 7.3.2 and 10.1 for more information about saving YASARA appropriate macro files.
7.2 Organization of a macro
Macros, regardless of function, all share a common header like that shown in Figure 7.1. The header is not shown or seen, unless the macro file is opened directly, but it can provide useful information to the reader such as the purpose and author of the macro.
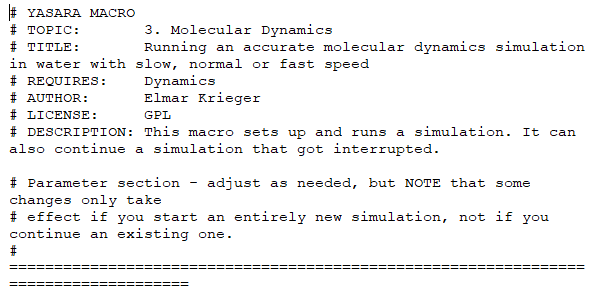
Figure 7.1: Macro header in YASARA
7.2.1 The # as a way to help your reader (and you!)
A list of YASARA commands, such as is shown below, can be dense to read and interpret.
LoadPDB 1crn, download=yes
AutoPosOriObj 1, x = 1, y = 10, z = 0, alpha = 0, beta = 0, gamma = 0
ColorRes cys, green
ShowRes cys
BallStickRes cys
AutoRotateObj 1, Y = 1
wait 180
AutoRotateObj 1, Y = 0
ZoomRes Cys 16, step = 50
wait 100
ZoomRes all
Just reading this list of commands and finding the one you need is difficult. Any line that starts with # however will not be read by YASARA and can serve to help reduce the density of text and is good for writing notes to your future self as shown below.
# Load the structure of crambin from the internet
LoadPDB 1crn, download=yes

# Position and orient the object as below to better show the over structure
AutoPosOriObj 1, x = 1, y = 10, z = 0, alpha = 0, beta = 0, gamma = 0

#Color the cysteine residues green and show them as ball-stick forms
ColorRes cys, green
ShowRes cys
BallStickRes cys

# Rotate the object, wait for 180 degrees, then stop
AutoRotateObj 1, Y = 1
Wait 180
AutoRotateObj 1, Y = 0

# Zoom in on cysteine 16 over the course of 50 steps, wait for 100 screen refreshes, then zoom out
ZoomRes Cys 16, step = 50
Wait 100
ZoomRes all, step = 50
Reading the annotated commands above, it is clearer what is intended and how the code leads to this result. Use # as a note to your future self so that if you need to re-use code or want to troubleshoot, you can find your target easier.
7.3 Making a macro
To make a macro, open your text editor then make your header followed by your commands. HERE is a general template that can be derived as needed. The first set of commands are shown in the code box below and they set the environment. These settings can be adjusted as needed (use SearchDoc for more details) but are good places to start for most computers.
# Change working directory to the place of this macro
# (so that we don't have to specify paths when loading stuff).
CD (MacroDir)

#If there is an error, the macro continues
OnError Continue

# Don't show console and head up display
Console Off
HUD Off

# Set default parameters
CoordSys Left
Projection perspective
StickRadius 50
BallStickRadius 50,50
AtomTexture 1
Fog 70
ColorFog Black
SurfPar Resolution=3, Molecular=Gaussian
AtomSize 100

# Animation delay
delay=400

# Set the YASARA window size
ScreenSize X=1024,Y=768,Scale=1
7.3.1 Commands that can be used in a macro
After the header and the environment settings, the YASARA commands can then be typed with one command per line. For most macros that are simply displaying structures, the commands like Color (4.3), PosOri (4.1), and Label (5.2) along with broader sets of commands for changing display style (4.2) and surfaces (4.4) work just as they would be typed into the command line. However there are additional commands that can be useful as well.
7.3.1.1 Rotate
The Rotate command is similar to the PosOri commands described in section 4.1. In Rotate, the Obj is specified along with the axis of rotation (X, Y or Z) and the number of degrees as shown below.
# Load the structure of crambin from the internet
LoadPDB 1crn, download=yes

# Rotate  Obj 1 30 degrees around the Y-axis
RotateObj 1, Y = 30

# Rotate the Obj 1 30 degrees around the Y-axis and 20 degrees around the Z-axis
RotateObj 1, Y = 30, Z = 20
For macros that are being used to display information in a presentation style, it is worth using AutoRotate, which animates the rotation in a nice format. The command is the same, except Auto needs to be inserted before Rotate as shown below. One caution is that AutoRotate needs a stop command in the form of the same command with the axis rotations set to 0.
# Load the structure of crambin from the internet
LoadPDB 1crn, download=yes

# Rotate  Obj 1 around the Y-axis in 1 degree steps
AutoRotateObj 1, Y = 1

# Rotate the Obj 1 the Y-axis and the Z-axis in 1 degree steps
AutoRotateObj 1, Y = 1, Z = 1

# To stop rotate set the axis to zero
AutoRotateObj 1, Y = 0, Z = 0
Stylistic suggestion: Do not set the AutoRotate command to move more than 2 degrees per step as it can get disorienting with fast spinning.
7.3.1.2 Displaying images
Images can also be added to a macro and positioned within the viewing window, however it is a two step process.
Load the image file into the program using the commands
LoadPNGandLoadJPGdepending on your file typeShow the image using the command
ShowImagefollowed by a number. If you have only loaded 1 image, this value is likely 1.
ShowImage also takes commands to position and size the image within the viewing window as detailed below and shown in the code chunk with the results shown in Figure 7.2.
X and Y : These set the coordinates for the top left corner of the image. These can be negative if you want the image to be moved down and right.
** Width and Height:** Sets the width and height of the image. If they are larger than the image itself, then the image will be reduced on the screen.
Alpha: Like surfaces, you can adjust the transparency of an image. 100 is non-transparent, while 0 is completely transparent.
Priority: This is the layering function of the command. If set to 1, then the images is on top, if set to 0, then it is on the bottom and any structures will appear over the image.
# Load the image called slide_1 into the memory
LoadJPG example

# Show the image at full size
ShowImage 1

# Show the image, but at a different position
ShowImage 1, X = -1100, Y = -500, Alpha=100, Priority=1

# Show the image, but at a different position and scaling
ShowImage 1, X = -100, Y = -500, Width = 5000, Height = 5000, Alpha=100, Priority=1

# Show the image underneath of DNA
LoadPDB 1BNA, download=yes
ShowImage 1, Priority=0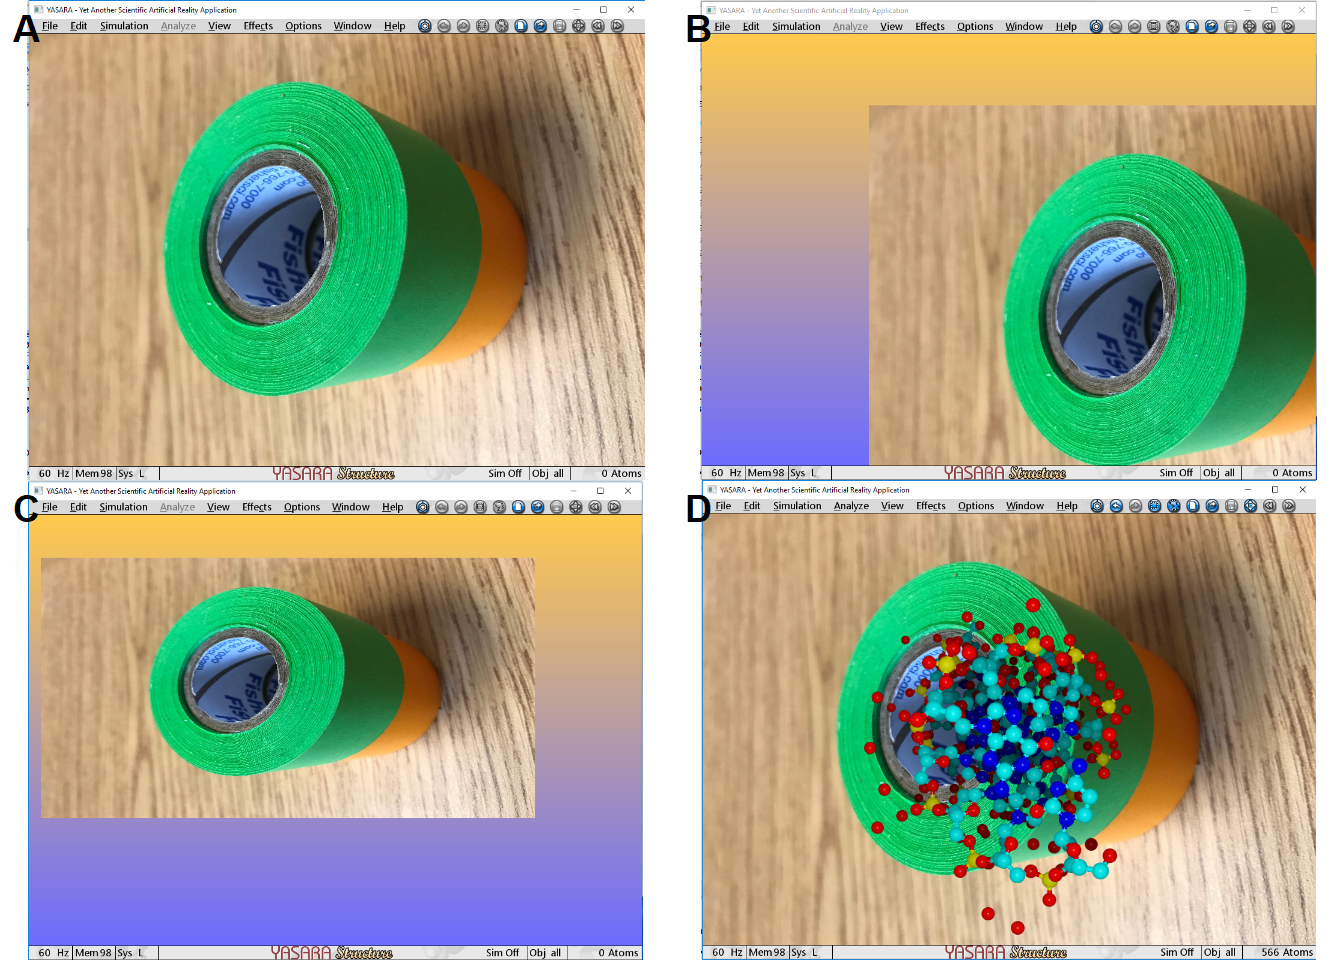
Figure 7.2: Results from Load and ShowImage commands
Images can be useful for showing reference or acknowledgement slides. To do this, list your references in a Powerpoint slide, Photoshop image, or whatever format can be easily converted to a .PNG or .JPG file. Then import the references into YASARA at the end of your macro.
7.3.1.2.1 Hiding or removing images
When an image is no longer needed, it is prudent to hide the image on the screen or delete the image from the memory. To hide the image, the command is HideImage followed by the image number. To delete the image, the command is DelImage followed by the image number. Hide is preferred if the image will be needed again, such as a background image.
7.3.1.3 Showing messages
Messages are a useful way to annotate your pictures beyond what a label can show. The command is ShowMessage followed by the text of your message.
# Show the message "Hello World!"
ShowMessage Hello World!
The limits of the text using ShowMessage are not always clear and should be optimized for your screen size. If a message is too long for the screen to display in a single frame, then the message will scroll from left to right in a repeating loop. Also, certain punctuation can cause issues for messages.
7.3.1.3.1 Hide messages
To hide a message the command is HideMessage.
7.3.1.4 Wait
Wait commands can be useful for stopping the macro until a certain time or action occurs. For macros containing a mixture of structures, text, and images, Wait commands are the way to stop YASARA so that the viewer can see and understand the screen display. The basic Wait commands are:
Wait XXX: The XXX value is replaced with a number equal to the number of screen refreshes. For a 60 Hz screen, 60 would mean ~1 second.
Wait Button: The scene holds until the viewer clicks a mouse button. This can be further specified to
LeftButtonif desired.Wait ContinueButton: YASARA will displays a box labeled “Continue” in the bottom right corner and the scene holds until the viewer clicks the button.
Wait MarkedAtom XXX: The scene holds until the viewer clicks the atom specified by XXX.
Here is an example of a mixed ShowMessage and Wait command.
# Show message until user clicks the continue button then hide the message
ShowMessage Hello World!
Wait ContinueButton
HideMessage
7.3.2 Saving the macro
To save the macro, save the document as you normally would, however append the file extension of .mcr. In Notepad, this requires going file>Save As, then typing a file name, and changing the “Save as type” to “All files”. On a Mac, TextEdit may not allow you to add the exension when you save, however you can change the file extension ((macrotext)).
7.3.3 Playing the macro
When playing a macro, make sure that all associated models, images, or other files are included in the folder with the macro file. Otherwise you may have errors or missing scenes while playing the macro.
Macros can be played through the file system by:
Options>Macro & Movie>Play Macro, and then selecting the .mcr file to play.
Via the command line:
# command to play the macro
>PlayMacro path\to\macro\awesome_macro.mcr
7.3.3.1 Drag and Drop
The easiest way to play a macro is to drag the file into an open YASARA window.
7.4 Macro examples
Below is an example of part of a macro that loads the structure of DNA and shows how steric clashing causes problems. The complete macro can be found here. Not all of the commands in the macro have been described in this guide, but they can be found in more detail using SearchDoc.
# Header


# YASARA MOVIE
# TOPIC:       Thermodynamics
# TITLE:       Thermodynamics
# REQUIRES:    View
# AUTHOR:      Chris Berndsen
# LICENSE:     CC-BY-4.0
# DESCRIPTION: An educational resource to thermodynamics in Biochemistry I


# Set the YASARA environment
CD (MacroDir)
OnError Continue
# Don't show console and head up display
Console Off
HUD Off
# Set default parameters
CoordSys Left
Projection perspective
StickRadius 50
BallStickRadius 50,50
AtomTexture 1
Fog 70
ColorFog Black
SurfPar Resolution=3,Molecular=Gaussian
AtomSize 100
# Animation delay
delay=400


# Macro bits

#
# SLIDE 1: Sterics
#
Steric:
#
Clear

#Load the molecule, remove waters, and position it
LoadPDB 1BNA, download=yes
Style BallStick
DelRes HOH
PosOriObj 01, X=0.000, Y=0.000, Z=67.620, Alpha=101.323, Beta=330.643, Gamma=5.241

# Show message and wait until continue button is pushed then hide the message and show another message (x2)
ShowMessage This is the structure of DNA.
ShowButton Continue
Wait ContinueButton
HideMessage
ShowMessage While not shown here, molecules are always moving and stretching.
ShowButton Continue
Wait ContinueButton
HideMessage
ShowMessage Stable molecules are in equilibrium with less stable forms of the molecule.
ShowButton Continue
Wait ContinueButton
HideMessage

# Hide the side chain atoms and zoom in on bases 7 and 18, with  some formatting
HideAtom sidechain
ZoomRes 7 18
ColorRes all, grey
ColorRes 7 18, element
ShowRes 7 18

# Center the atom on the screen
CenterAtom Atom 361

# Rotate about the axis for 330 steps then stop and wait for 0.5 seconds
AutoRotateObj 1, Y = 1
Wait 330
AutoRotateObj 1, Y = 0
Wait 30

# Rotate about the axis for 360 steps then stop and then show a message
AutoRotateObj 1, X = 1
Wait 360
AutoRotateObj 1, X = 0
ShowMessage Shown are two nucleotides within DNA forming a base pair.
ShowButton Continue
Wait ContinueButton
HideMessage

# Add hydrogens and then show the hydrogen bonds and a message.
AddHydObj 1
ShowHBoRes 7 18,Extend=No
ShowMessage Hydrogen bonds have been added in yellow to show how these atoms interact.
ShowButton Continue
Wait ContinueButton
HideMessage

# Rotate and then show two messages
AutoRotateObj 1, Y = 1
Wait 360
AutoRotateObj 1, Y = 0
Wait 30
AutoRotateObj 1, X = 1
Wait 360
AutoRotateObj 1, X = 0
ShowMessage Like all weak bonds, the atoms are in motion and moving apart and together to find the most stable state.
ShowButton Continue
Wait ContinueButton
HideMessage
ShowMessage How do you think this interaction would be affected if the atoms were in different positions?
ShowButton Continue
Wait ContinueButton
HideMessage

# Rotate and then make a mutation, rotate again to show the mutation effects, then show a series of messages.
AutoRotateObj 1, X = 1
Wait 90
AutoRotateObj 1, X = 0
Wait 30
SwapRes Atom 210, DA,Isomer=L
ShowHBoRes 7 18,Extend=No
Wait 30
AutoRotateObj 1, X = 1
Wait 360
AutoRotateObj 1, X = 0
ShowMessage Is this interaction more stable now that the atoms  are closer?
ShowButton Continue
Wait ContinueButton
HideMessage
ShowMessage It is likely that these molecules would adopt a new position to reduce the unfavorable overlap of atoms.
ShowButton Continue
Wait ContinueButton
HideMessage

# Zoom out and then change the scene
ZoomAll
ShowRes All
ZoomAll

# Rotate and then show a series of messages
AutoRotateObj 1, X = -1
Wait 90
AutoRotateObj 1, X = 0
ShowMessage How might this overlap affect the overall stability of the larger molecule?
ShowButton Continue
Wait ContinueButton
HideMessage
ShowMessage Hint: If you have taken a BIO course, how common are A:A base pairs?
ShowButton Continue
Wait ContinueButton
HideMessage
ShowMessage Remember, molecules and reactions will always try to find the most stable state in the environment.
ShowButton Continue
Wait ContinueButton
HideMessage
ShowMessage The shape and function of biomolecules depends on this principle.
ShowButton Continue
Wait ContinueButton
HideMessage
7.5 Knowledge Checks10
- Create a macro that loads the PDB file 1UBQ, deletes the waters, centers the protein on the screen, and then cycles through each of the representations with a message describing what is shown. Have a 2 second wait between each change in representation.